Showing posts with label Memory Keeping. Show all posts

Monday, July 31, 2017

Summer Vacation 2017 in 1SE Video

One of my favourite methods of documentation this year has been the use of the 1 Second Everyday app. The timeline mode has been great for capturing our everyday life. 

When we were on our vacation, I added a new project and switched from timeline mode to freestyle mode. This allowed me to take videos throughout our days and put them together in a quick video (instead of just 1 video per day). I love how this short video highlights the fun (and some not-so-fun) aspects of our vacation.

We flew to Cleveland (via Toronto & Laguardia), drove to Pittsburgh, drove through Pennsylvania to upstate New York for a visit to Animal Adventure Park, and then returned to Cleveland. We went to 1.1 ball games, which means I have some more ball parks to add to the MLB album. 1.1 games, you ask? Just before the national anthems, we tried checking in for our flight, had issues, and had to head back to the hotel to deal with our airline, so we missed the actual game. Luckily, my husband had spent time at the park before the start of the game. 


Of course I gathered all kinds of memorabilia and have lots of photos for a traveler's notebook, but I love how this 2:38 video tells the story of our vacation. The video and sound add another dimension to my memory-keeping.

Saturday, June 10, 2017

Happy Planner Update

For my everyday memory-keeping, I decided to use a Happy Planner this year. 

I created some spreads that I really liked, and then I found a different Happy Planner that I liked better than the one I had been using, so I decided to move everything to the new planner. 

I managed to get my journaling printed on several pages of the new Happy Planner, and luckily I stamp onto cardstock, so much of the stamping I had done, I was able to move to the new planner.

And then life happened.

Between being sick and being swamped with preparation for the Japanese students arriving for the exchange program this summer, I haven't been able to keep up with all of my memory-keeping projects. However, I have been keeping track of all the things I want to record in my Happy Planner when I have time. 

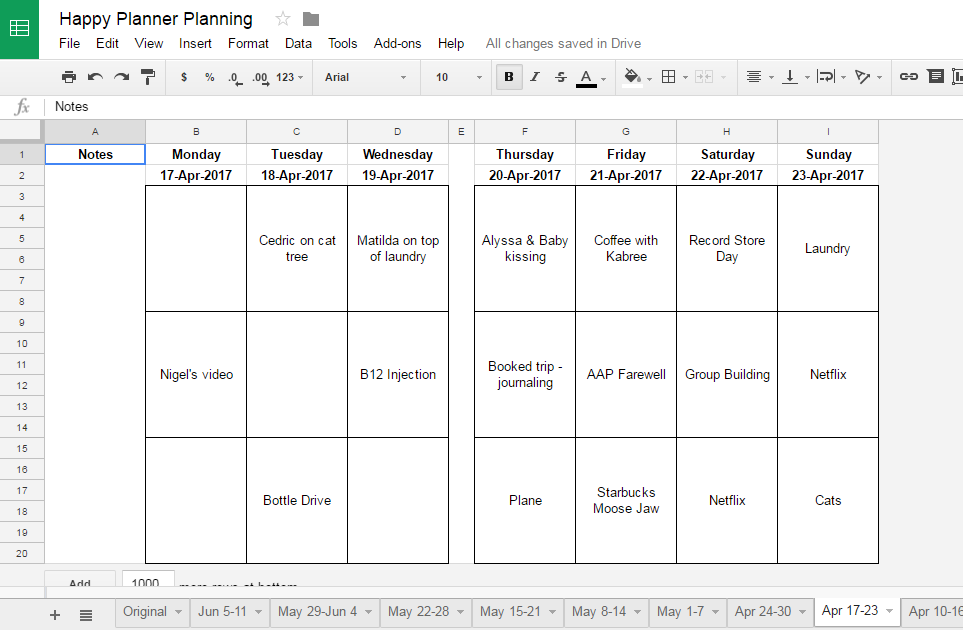
A couple of times each week, I take some time before I go to bed to jot down what's been going on this week. I scroll through my camera roll and calendar and make note of the things I want to remember, and then I record it in a Google Sheet (which I can access on my computer or my phone).


When I do have a bit of time, I write and print my journaling and re-size and print photos for my Happy Planner. This way, when I have time over summer holidays, my spreads should come together quickly.


In a perfect world, I'd have time set aside to update my Happy Planner each week. But it's not a perfect world. This is real life. Sometimes it's hard to find balance between the things that I have to do vs. the things that I want to do. Instead of feeling guilty about what I'm not getting done, I've made a plan for how I'm going to get this project done.

Saturday, April 1, 2017

Shop Local, Eat Local Traveler's Notebook

Back when traveler's notebooks were starting to become popular, I decided to order some inserts to give them a try. I'd been digital scrapbooking, which I still enjoy, but I was missing the tactile act of making something with my hands, so I figured a traveler's notebook would be a great option for capturing our travels.

However, when the inserts arrived, it was the middle of the school year, and we do the majority of our trips in the summer. What was I going to do with my TN inserts until then? I decided that I would become a tourist in my hometown. We love to shop & eat local, so I started a notebook to capture all of the places we love to visit in our city.

This has been a rewarding project. As much as I love to travel, I spend most of my time in this city, and this notebook has made me appreciate the everyday places so much more.

Here are my shop local, eat local TN spreads so far:


Cover: Kelly Purkey: Around Town (kit), Greenpoint Alpha, alpha stickers

Kelly Purkey: Planner Stamps 
Kelly Purkey/One Little Bird #Hangry & Kelly Purkey New Adventure


Kelly Purkey: I Love Weekends (Kit)

Kelly Purkey: Coffee & Donuts, Kelly Purkey/One Little Bird #Hangry

Kelly Purkey: Playlist (kit), Around Town (Kit)

Kelly Purkey: I Love Weekends (Kit), alpha stickers

Kelly Purkey: Alpha Tabs 


Kelly Purkey: Hoppy Hour

Christine Herrin: Caffeine Fix, Do the Work

Kelly Purkey: Stay Cool (kit) + One Little Bird: Destination

Kelly Purkey: Daily Cup, Everyday Alphabeth + Christine Herrin: Caffeine Fix


Saturday, March 4, 2017

Ink Storage

When we moved into our house ten years ago, I set up a craft area in our basement. I was doing Stampin' Up at that time, and often had people over. I had a large area where I could set up tables for card-making parties, and lots of space to store all of my craft supplies.

However, when I got back into memory-keeping and was working on projects by myself, I felt isolated, and since it was in the basement, I had no natural light. I decided to move upstairs to the dining room where there is a large window. However, since it's my dining room, I have limited space to store my stuff, and I need to keep it out of sight when I'm not using it.

I work at a standing desk and I have an Alex drawer unit below that houses many of my most-needed supplies. I still have craft storage downstairs, so sometimes I need to go for a walk. That's where my Color Caddy of Stampin' Up inks resides. 

However, I store my most-used ink pads in one of the shallow drawers in an Alex unit from Ikea. 


I love how the Ali Edwards ink pads stack so nicely, and I can easily stack 5 high in this drawer. 

My Kelly Purkey ink cubes are stored in a photo case so it's easy to grab them all at once.

This solution has worked well for me because it's easy to clean-up and put things away after a crafting session. Since my standing desk in the front window of my house, I also have added motivation to keep it tidy!

Tuesday, February 14, 2017

Printing in My Happy Planner

A month into the year, I decided that I was going to switch to a Happy Planner for my weekly memory keeping as I was finding that my 2-page spread in the traveler's notebook was too small for including all I wanted to say/document for the week.


Week 1 in my traveler's notebook. It was feeling too cluttered for me.
Since I was going to be using a planner that allows me to take pages in and out easily, I realized that I could easily feed the paper through my printer so that I could print my journaling. This would work with any disc-bound or ring-style planner, and it is possible to order some planners unbound, so if you have a favourite planner layout, this should work in any planner with removable pages.

I took measurements and made a template in Photoshop. My template is on an 8.5x11 size paper - I measured the dimensions of the page, and then the dimensions/locations of the columns/boxes in the planner. In the image below, you can see the white planner page on top of the transparent background of a letter-size paper. 


This is the template with all of the sections visible. The turquoise lines are guides and do not print.

I picked the font that I wanted to use and played with font size and spacing, and then I did some test prints to make sure that everything was printing where I wanted it to print. Luckily, I had purchased an 18-month planner 6 months in, so it was not only 50% off, but it provided lots of pages for printing proofs. While I had my daily columns figured out pretty quickly, it took some experimentation to get the spacing correct for the lines on the notes section of the left page.

I created text boxes for the notes section as well as for each box of the Happy Planner, and then I added my journaling to the appropriate boxes and hid all of the text boxes that I was not using for text.


Notice how the "eye" is turned off on the layers that are not visible.


When I was ready to print, I fit my paper inside the box on my 8.5x11 paper and adhered it with washi tape, and then ran it through the printer. 


The outer box indicates where to tape the Happy Planner page.


The only downside to this method is that can't add photos, etc. to the pages until I've printed on the opposite side of the page. All that means, though, is that I have to switch to documenting Thursday-Wednesday instead of Monday-Sunday.

Here is week 1 almost re-done. I had printed my journaling and photos and had done most of my stamping, but I still needed to adhere everything, add some patterned paper, and cover up those bows on the bottom. I had already printed the journaling on the back-side of the right page, so it was okay for me to start adhering, but the items on the left page need to wait because I'm not sure if I'll need to run that page through the printer again for the other side of the paper. The other side is a monthly calendar, and I need to decide how I'm going to use that.


*See my note below about how I fixed the missing line of text in the notes section.
Since I have the photos printed and stamping done, and everything is little, I figured out a super-simple plan for housing the things that I'm not ready to adhere: I have a Project Life album that never used, so it's now the storage location for the bits and pieces.


Since I was able to adhere items to the right side of the layout, I have completed that page.


*Once I had posted the photo of the 2-page spread to Instagram, I noticed that the bottom line was cut off on the notes section. I remembered making a small adjustment, and didn't realize I had cut off text. In order to fix it, I adjusted my text box, took all the text in that column that I had already printed and made it white, and hid the rest of the text boxes on the page. This allowed me to print the missing text exactly where it needed to be. I ran the paper through the printer again, and it's all good now.


I think I'm going to love using the Happy Planner for my weekly spreads. I love my other traveler's notebooks, but this just feels cleaner and more my style.


Sunday, January 1, 2017

December Daily | Days 1-12

I've been making steady progress on my December Daily album. Some days have simple spreads, while others are more involved. I even broke out my heat-embosser one day!

Here's my progress to date:


I have to print a better photo for this page.


Check out that heat-embossed "Let it Snow"!


I seriously love my heated steering wheel


I need to print photos and journaling cards for the rest of the month. Since my traveler's notebook had room for all 31 days, I'm documenting the entire month.

Sunday, December 18, 2016

December Daily | Day 1

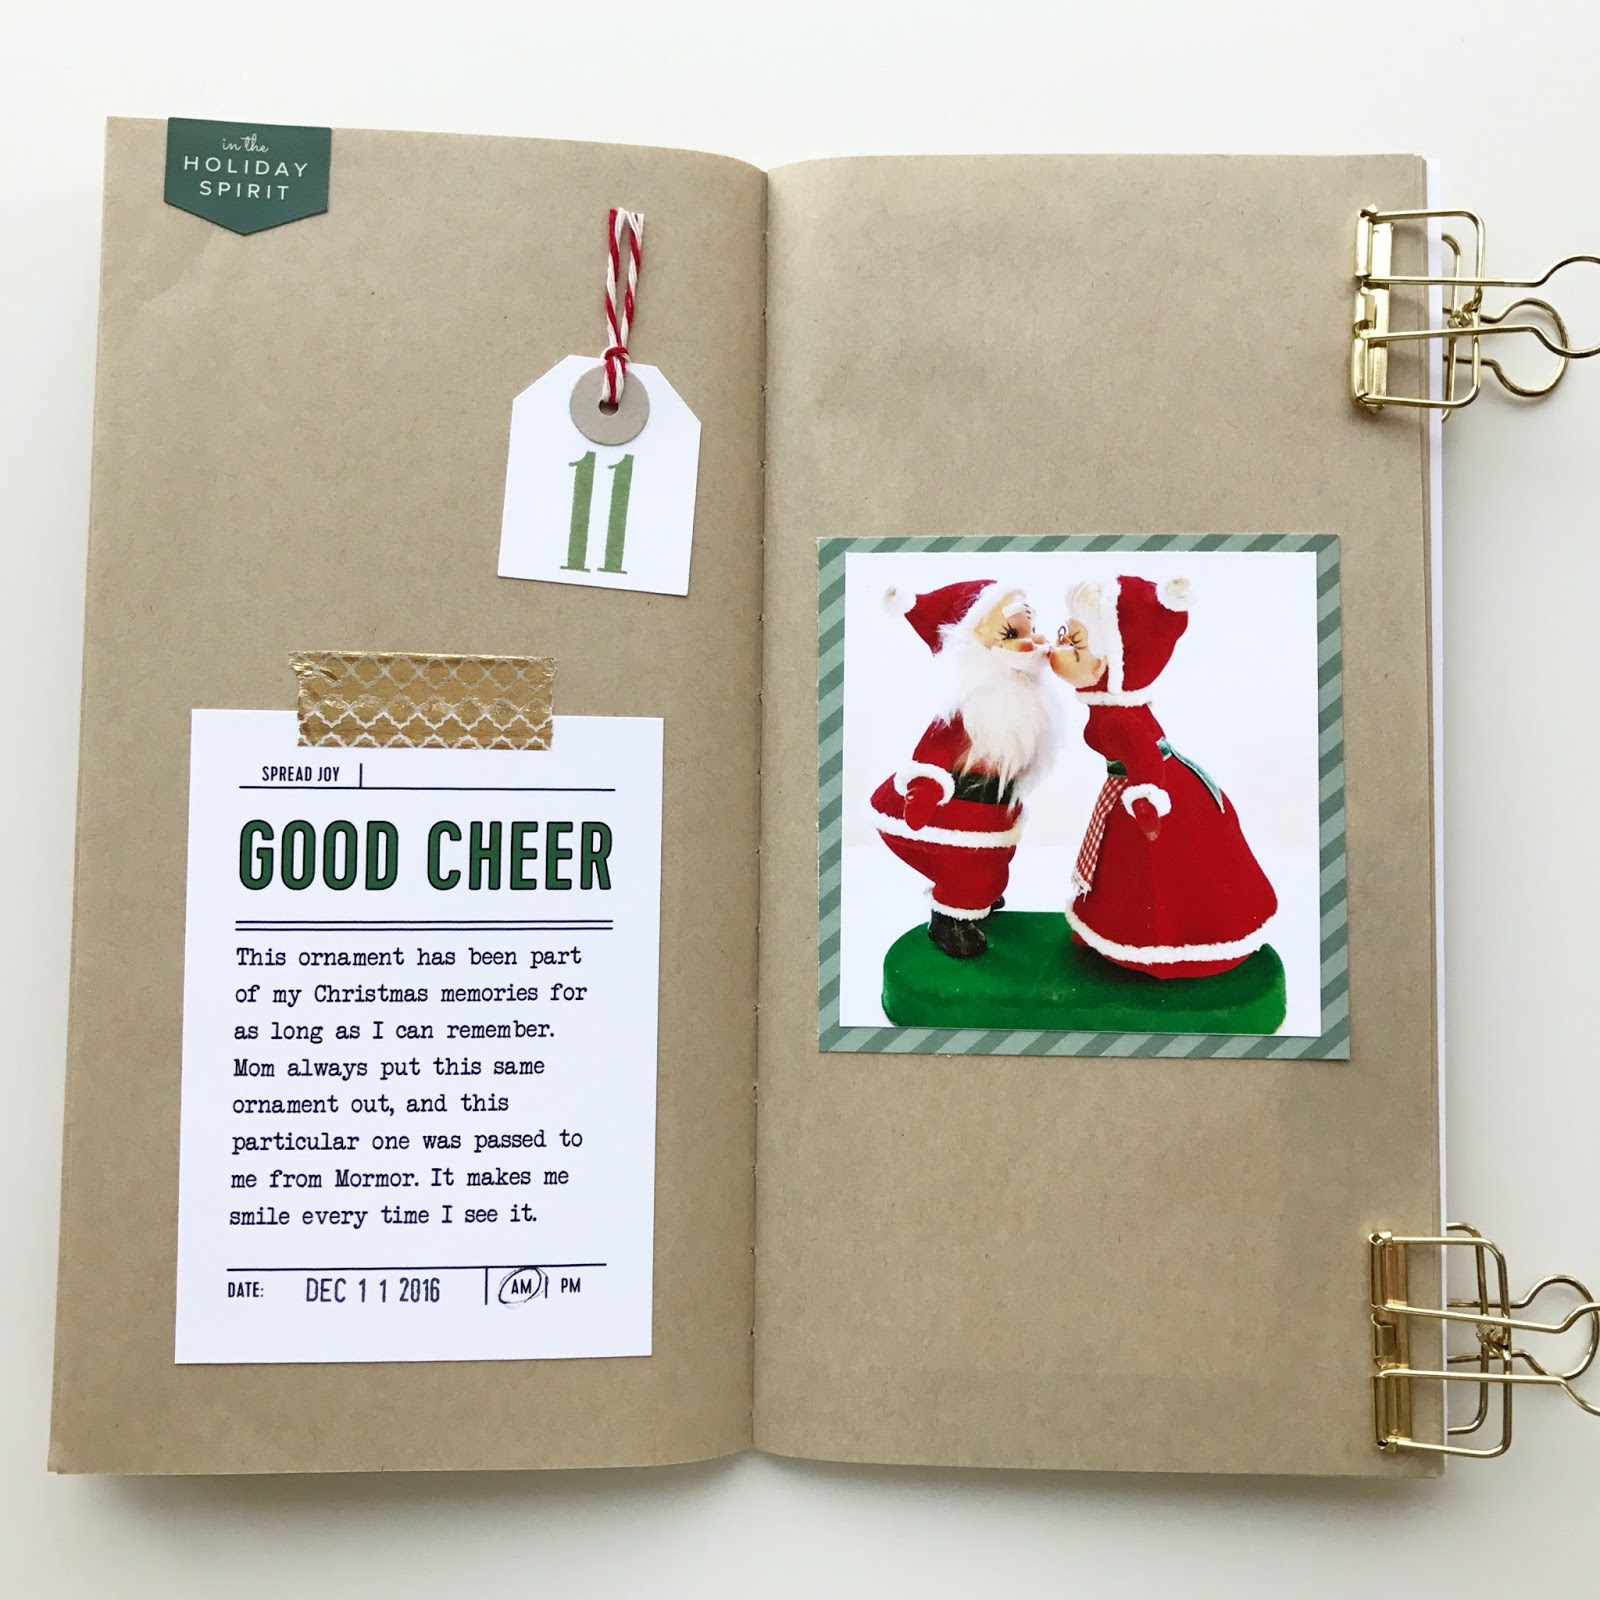
Today I finally had a chance to start putting together my December Daily notebook. I managed to finish one spread.


I didn't get any more spreads in the notebook because I spent the remainder of my craft time mass-producing some tags that I'll use each day. I knew that I wanted to use the Southport alpha stamp to stamp the number of the day, and I had a particular tag in mind. When I couldn't find the tags I was looking for, I made my own.


Luckily, when I got rid of some of my Stampin' Up stuff, I decided to keep a few items that came in handy. I used the tag punch, a small circle punch, and a small hole punch to make the tag. Then I threaded it with some red & white string and stamped the number of the day.


Thursday, December 15, 2016

December Daily 2016

Every year I see amazing December Daily albums in my Instagram feed, and every year I think I should give it a try. However, I always have lots of projects on the go, so I usually decide to enjoy everyone else's posts. This year, though, I had major FOMO, and I ordered a kit and a stamp set at the last minute (as well as some other goodies).


Since I knew that it would arrive late, I started a Google Doc to keep track of what I'd include for each day and to jot down some journaling, and then I bought some digital holiday prompt cards, and I got my journaling up-to-date and cropped and printed photos, so by the time my kit arrived, I was ready to go.


I know I'll be behind, but I think this is a project that I can finish because I'm going to keep my supplies simple:

Sunday, November 13, 2016

Progress on Weekend Projects

On Friday, I made some public goals for the projects I wanted to tackle this weekend because #makeitpublicmakeithappen

How did I do?  

1. Document our cat drama from the past week

Progress: Done

When I saw the Hot Mess kit, I knew it would be perfect for documenting the not-so-great moments. I didn't think I'd ever use it this way, though.

Supplies
Hot Mess Kit (monthly kit subscription)

2. Add a Leonard Cohen tribute to my music traveler's notebook. 

Progress: not quite yet. My husband has a vinyl pic that we need to print, but our home printer needs ink, and I'm too busy to run out to get more at the moment. I will finish this layout this week.

3. Print more of my coffee pics and play with my new Christine Herrin stamps.

Progress: done - and I'm going to use this stamp set all. the. time.


Supplies: 
Caffeine Fix stamp set
Hoppy Hour stamp set from Kelly Purkey Shop (no longer available)
4. Work on the cover of my shop local, eat local traveler's notebook. 

Progress:  *almost* done - my plans changed once I started working on it, and now I need to take a photo. The stamping is done, though.


Supplies: 
Around Town Kit (monthly kit subscription)
Greenpoint alphabet set
Urban Inks
5. Work on some spreads about our getaway to Winnipeg (which happened in August)

Progress: not done, but photos are printed and trimmed

When I grabbed my Weekend Getaways notebook, I realized that I hadn't actually finished any layouts from my past two trips. I had printed photos and stuck memorabilia in the notebook, but that was it. I need to work on this notebook more.

6. Keep making progress on our summer vacation traveler's notebook.

Progress: Umm, I glued a map onto one of the pages and stamped something on it :) That's about it for this weekend, but it's better than nothing! 


Friday, November 11, 2016

Playing Catch-Up

After we returned from our vacation, I was hit with a virus that took me out of commission for about 6 weeks. By that point, we were back to school, and with several staff changes, it has been a busy fall. The students in the alternative program that I teach in do not do well with change. We've also had some cat issues in the house (i.e.: the older one isn't any closer to accepting the kitten and has developed health issues as a result of the stress, and the kitten ingested a foreign object and had to have surgery).

What does all of this mean? My creative time had to be put on the back-burner either because I had no time or because I had time but was simply too exhausted. 

This past week I've managed to find some time to work on our Traveler's Notebook from our summer vacation, and that has inspired me to tackle some projects on this long weekend:


1. Document our cat drama from the past week

2. Add a Leonard Cohen tribute to my music traveler's notebook. Thanks, Kelly Purkey for the quote. If you don't already, subscribe to her newsletter.

3. Print more of my coffee pics and play with my new Christine Herrin stamps.

4. Work on the cover of my shop local, eat local traveler's notebook. The Around Town set from Kelly Purkey Shop (kit subscription) will be the perfect addition - it must be why I waited to commit to a cover! 

5. Work on some spreads about our getaway to Winnipeg (which happened in August)

6. Keep making progress on our summer vacation #travelersnotebook.

#makeitpublicmakeithappen  


Friday, July 24, 2015

Orlando Trip Scrapbook Pages

I am a digi-scrapper. The great thing about that is I can make a page for my son's album, and then make a few modifications to the journalling and save it again for our family album.

Once we were back from our trip to Florida, it didn't take long to document our travels:


For the map card, I added a few layers: a PNG of a plane, a geotag over Orlando, and a scan of the boarding pass. I liked how the route was mapped out on this page by Scrappy Jedi, so I adapted it for digital, and I saw the idea for adding the boarding pass here.

The "By the Numbers" was inspired by this page by Gluestickgirl.


{8.5x11 Insert - front & back}

How we told our son we were going to The Wizarding World of Harry Potter

Scans of park maps

{6x12 Insert}

Map of spell locations


{5x7 Insert - front & back}


{5x7 Insert}

Postcard sent from Owl Post

{6x12 Insert - front & back}


I measured the size of the candy packaging and left space. Then I printed a 12x12, cut it in half and added candy packages.


{8x10 Insert - front}


I really wish there was a 6x8 horizontal page protector available as almost all the photos we get at tourist locations are this size. There is a postcard from Clearwater Aquarium on the back.


See our travel tips for visiting The Wizarding World of Harry Potter here.

Digital Products Used:

Title Page
Facts About the Trip Card - Becky Higgins Wellington Edition Childhood Mini Kit
So Much Fun Card - Becky Higgins Wellington Edition Childhood Mini Kit (re-coloured)
USA Map Card - Pink Trike Design Let's Go Freebie

Simpsons Layout
Bring on the Awesome Word Art - Ali Edwards Find Joy Brushes & Stamps
Awesome Day Card - Becky Higgins Teen Boy Themed Cards
Heart This Arrow - I've looked through my digital stash and can't find where this is from. I may have made it, but if you know where it's from, please comment.

Hogsmeade Layout
Love This Brush & Overlay - A Vegas Girl at Heart
Vacation | Summer Life Word Art - Cathy Zielske Summer Life No. 1 Brushes & Stamps

Baseball Game Layout
Baseball Card - Becky Higgins Baseball Themed Cards
Good Eats Card - Anika at allerliebsteanika Journaling Card Freebie

End Page
True Story Card - Elise Joy Blaha Cripe (designer) Becky Higgins Seafoam Edition
Word Collage Card - Becky Higgins Cinnamon Edition (re-coloured)
Note Paper Card - Becky Higgins Wellington Edition Childhood Mini Kit (re-coloured)
Quote Card - Becky Higgins Teen Boy Themed Cards